Documentation Summary
Setting Up
Installation And Configuration
The Tharstern integration is an extension from ROI360.
Each Storefront deployment can connect to a single Tharstern system. Each Storefront deployment requires a Tharstern default account and Tharstern web service URL.
The following files must be installed in the WebPages directory:
/Bin/Tharstern.dll
/Bin/Extensions/TharsternStorefront.dll
/ROITharsLookupServices.asmx
To set up and configure the extension, on the Storefront Administrator website, go to ‘Administration > Extensions’ on the Storefront Administrator website. Next to some fields in the configuration you will see a blue question mark. By mousing over these, you can find out more information about how to fill in the corresponding fields.
The first step to set up the extension is to enter the web service URL and click ‘Update’.
The extension will then try to connect to Tharstern and if it succeeds, the ‘Account Code’ text box will be displayed. As before, enter a valid account code and click the ‘Update’ button. This will be the default Tharstern Account ID for the extension. Additionally each Storefront user can be assigned to a different Tharstern account which is further explained on Users page. This setting will then override the default account settings mentioned here. One of the main purposes of specifying Tharstern Account(s) is to determine which billing address will be used when the orders are sent out from Storefront by this extension.
Finally, the ‘Contact’ drop down will appear, allowing you to select one of the available contacts (a legacy feature).

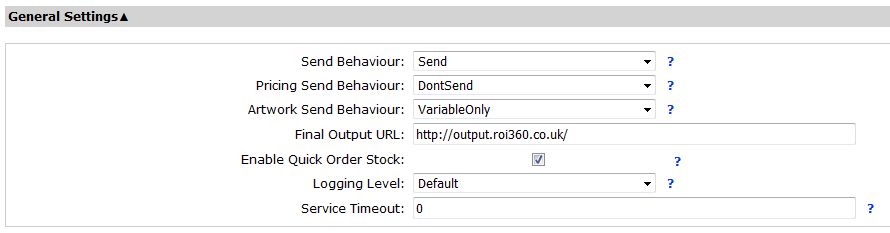
The ‘Send Behaviour’ determines whether order data is sent to Tharstern. When set to ‘DontSend’, the order XML is still created and included in the logs but the actual order is not sent. This is designed so that the deployment can be used for testing.
‘Pricing Send Behaviour’ determines whether the pricing details are sent to Tharstern.
‘Artwork Send Behaviour’ determines whether the artwork links are sent to Tharstern. When set to ‘VariableOnly’, artwork links are only sent for products of ‘Pageflex Print Product’ type. When set to ‘AllOutput’, artwork links are sent for ‘Pageflex Print Product’ product type and ‘Hosted PDF Product’ and ‘User Uploaded PDF Product’ types (only if these are also configured to copy output to the output folder in their Production Options).
‘Final Output URL’ specifies a URL to the output folder, which enables artwork to be sent to Tharstern. Leave this blank if you do not wish to send artwork.
The ‘Enable Quick Order Stock’ option is available in Storefront 8.3 and above. When checked, the integration will provide available stock levels for products in quick order categories that are linked to Tharstern.
‘Logging Level’ affects how verbose the logging is. The default level logs only essential information and errors, but this can be turned up for debugging or turned off altogether. The logs for the extension can be viewed under Activity > Logs. Additionally, logs pertaining to a particular order or item can be viewed in the activity for the relevant order or item’s details page.
‘Service Timeout’ determines how long in milliseconds the integration should wait for a response from the Tharstern web services. Zero means that the default timeout is used.
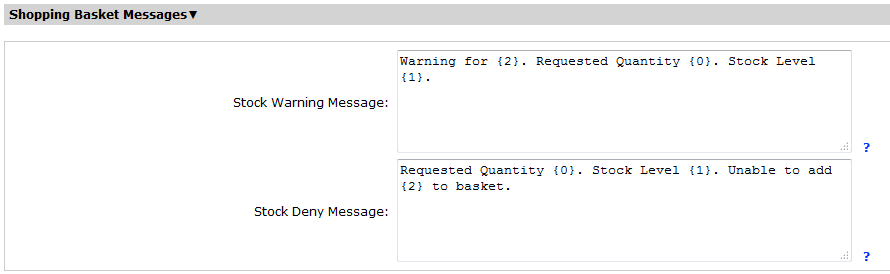
In the following section you can specify the messages to display to the user depending on the stock behaviour.
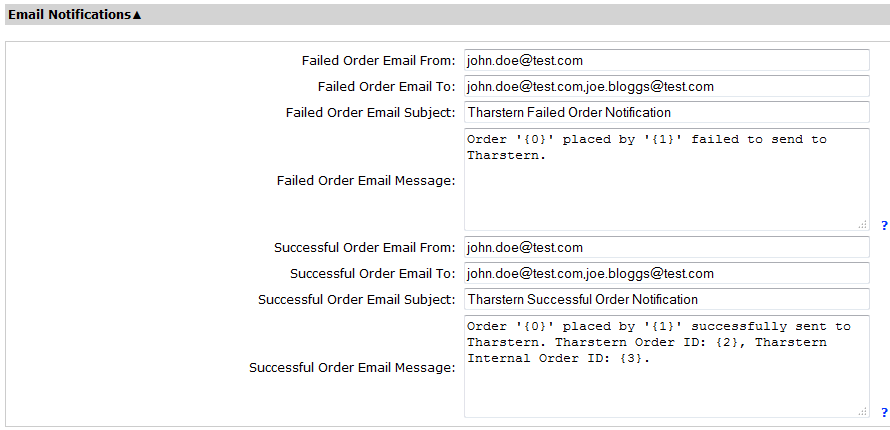
In this config section you can specify e-mail messages that will be sent automatically when the order sending process succeeds or fails. If the e-mail addresses, subject fields or message body are empty, no e-mails are sent. You can specify multiple recipients of an e-mail message as a comma separated list of e-mail addresses.
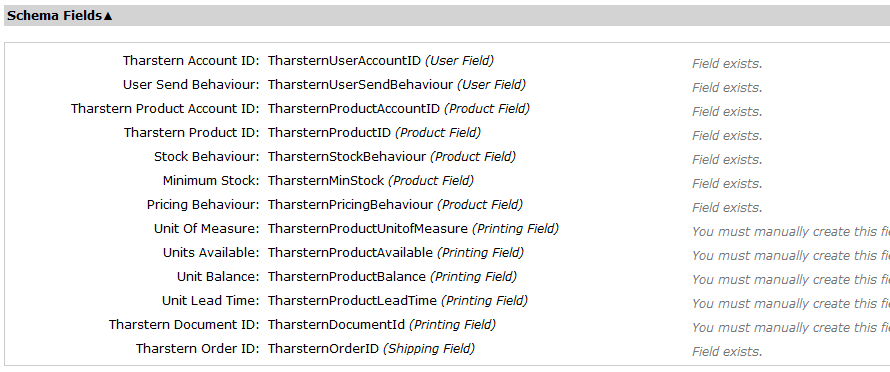
The extension requires various fields to be created to enable the integration if they do not exist already. Most of these fields are created automatically when the extension is launched for the first time, although some fields need to be created manually within each Storefront depending on whether they are needed.
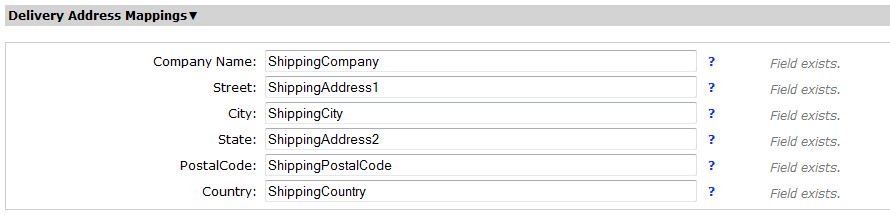
Storefront fields that should be mapped to delivery details are configured in ‘Delivery Address Mappings’ section. If you need to enter multiple fields, use square brackets around the fields and seperate them with a space (e.g. [ShippingFirstName] [ShippingLastName]).