Setting Up
Installation
The extension should be installed from Manage.
Files
WebPages/UserROI360SelfRegistration.ashx
WebPages/bin/AzureEventLogger.dll
WebPages/bin/Extensions/RightMarketSignInAndRegistration.dll
WebPages/ROI360/RightMarketSignInAndRegistration/AdminOptionField_CopyValues1.htm
WebPages/ROI360/RightMarketSignInAndRegistration/AdminOptionField_CopyValues2.htm
WebPages/ROI360/RightMarketSignInAndRegistration/AdminOptionField_FullWidth1.htm
WebPages/ROI360/RightMarketSignInAndRegistration/AdminOptionField_FullWidth2.htm
WebPages/ROI360/RightMarketSignInAndRegistration/AdminSiteOptionsLogin.js
WebPages/ROI360/RightMarketSignInAndRegistration/bootstrap-3.4.1.min.js
WebPages/ROI360/RightMarketSignInAndRegistration/bootstrap-modal-1.4.0.96.css
WebPages/ROI360/RightMarketSignInAndRegistration/bootstrap-modal-custom-1.4.0.96.css
WebPages/ROI360/RightMarketSignInAndRegistration/error-message-show-1.4.0.96.js
WebPages/ROI360/RightMarketSignInAndRegistration/FieldTemplate_CheckBox.htm
WebPages/ROI360/RightMarketSignInAndRegistration/FieldTemplate_DropDown.htm
WebPages/ROI360/RightMarketSignInAndRegistration/FieldTemplate_Email.htm
WebPages/ROI360/RightMarketSignInAndRegistration/FieldTemplate_Literal.htm
WebPages/ROI360/RightMarketSignInAndRegistration/FieldTemplate_Password.htm
WebPages/ROI360/RightMarketSignInAndRegistration/FieldTemplate_Text.htm
WebPages/ROI360/RightMarketSignInAndRegistration/information-red.svg
WebPages/ROI360/RightMarketSignInAndRegistration/password-validation-1.4.0.96.css
WebPages/ROI360/RightMarketSignInAndRegistration/password-validation-1.4.0.96.js
WebPages/ROI360/RightMarketSignInAndRegistration/PwdPeekEye1.png
WebPages/ROI360/RightMarketSignInAndRegistration/PwdPeekEye2.png
WebPages/ROI360/RightMarketSignInAndRegistration/UserJLogin.css
WebPages/ROI360/RightMarketSignInAndRegistration/UserJLogin.htm
WebPages/ROI360/RightMarketSignInAndRegistration/UserJLogin.js
WebPages/ROI360/RightMarketSignInAndRegistration/UserPage.js
Configuration
Once the extension is enabled on its configuration page
\&#xNAN;Administration > Extensions > RightMarket Sign In And Registration
it makes changes to both the Admin Site as well as the User Site.
Storefront Extension Configuration Page
On the extension configuration page, as a default, the Google reCAPTCHA service is turned on with the following default settings:
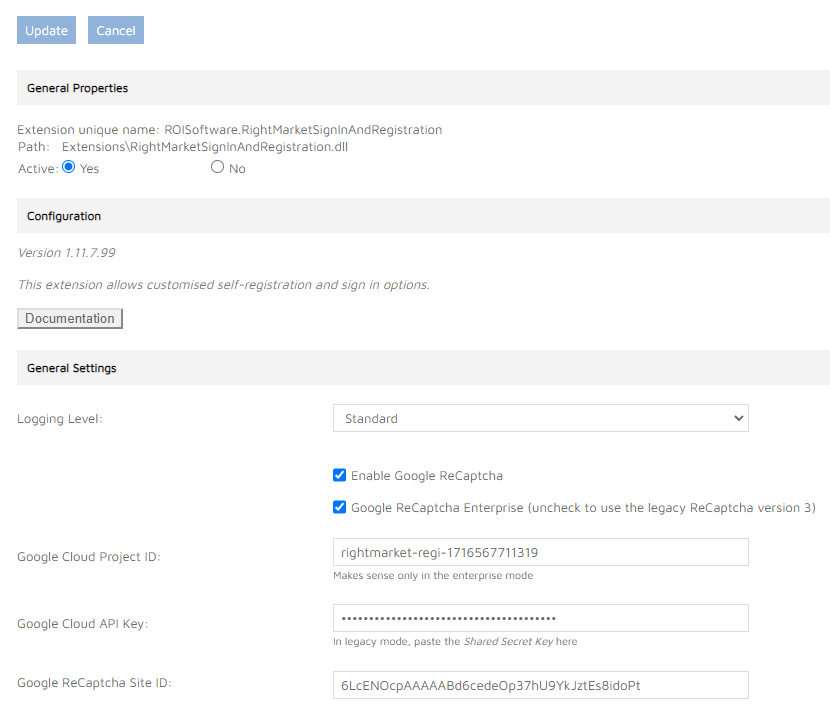
The user visiting our login page, filling up the registration form, is performing activities which are recorded by the Google reCAPTCHA client-side JavaScript. After the user clicks the final Create Account button, our server-side code communicates with the Google server which responds with a Score. The score is a real number, zero to one. It is a probability that the user input was done by a human being.
Three identifiers need to be set up:
In order to use the Google reCAPTCHA service, obviously, one needs a Google account. Within the account, a Cloud Project needs to be created. The ID of the project is the first identifier.
Next, there needs to be an API Key created for the Google cloud project. One project can have multiple API keys, each configured with different security settings, with different limitations. The appropriate API Key is the second identifier. It serves as the shared secret between us and the Google server, so it is shown in a password box. Please choose your browser’s Inspect Element… option to see the actual text.
Each Google cloud project has its own reCAPTCHA settings. There can be multiple Site IDs created for the reCAPTCHA service. Some of them can be configured as testing so that the service returns a fixed configured score, zero for instance. The appropriate Site ID is the third identifier.
Registration Field Definitions
On the admin site the extension modifies the behaviour of the registration form. Fields for the registration form are defined in Users > Profile Fields > Registration:
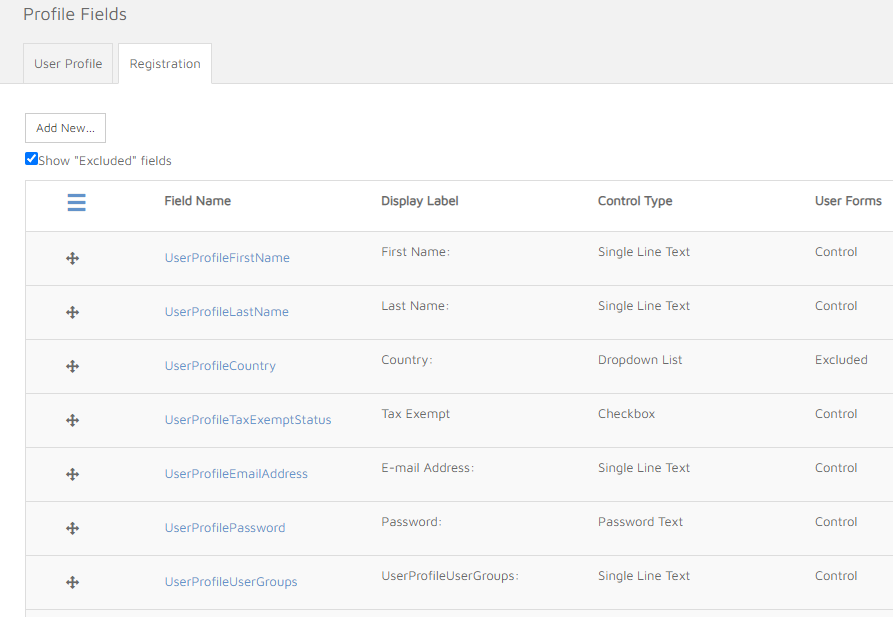
Special Fields
The extension uses three special fields to be always present in the list of registration fields with the following naming convention:
- “UserProfileEmailAddress” - this field is required and is used as the user name of the newly created user account. Validation is performed on this field.
- “UserProfilePassword” - this is the password field (required field). Validation is performed on this field.
- “UserProfileUserGroups” - this field is used for a comma-separated list of user groups the new user account should be added to.
Supported Field Types
When the extension is running, only the following field types are supported in the registration form definition:
- Single Line Text
- Password Text
- Dropdown List
- Checkbox
- HTML Literals
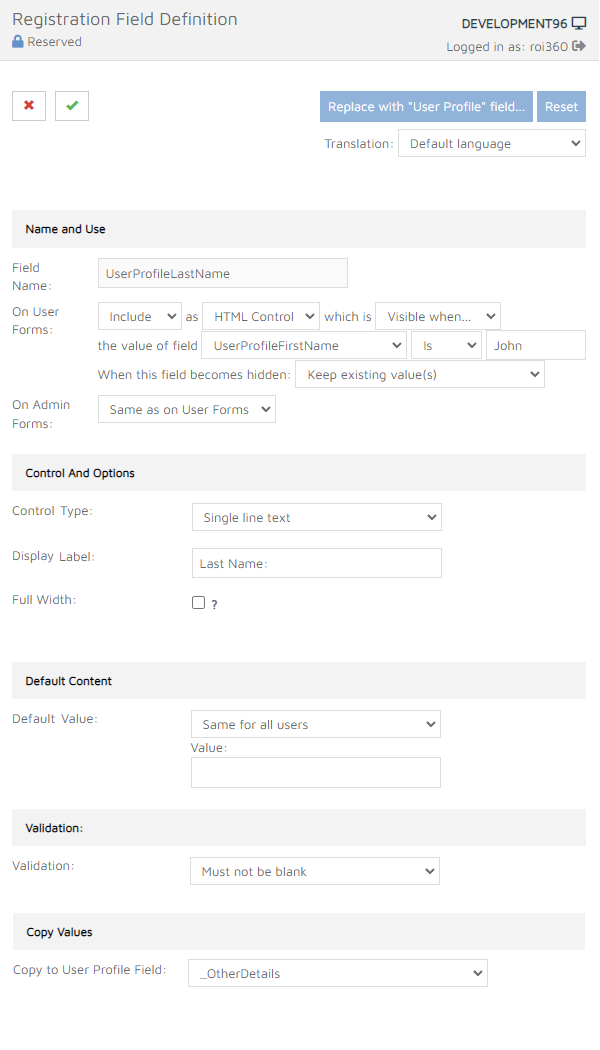
Visibility Rules
The extension hides certain options from the visibility-related rules.
Include and Exclude options are supported to show and hide fields appropriately.
Only HTML Control types are supported, Uneditable Text fields are ignored.
Always Visible, Always Hidden, Visible When and Hidden When are supported.
When Visible When or Hidden When are selected, the only supported conditions are the Is and Is Not.
All three options for When This Field Becomes Hidden are supported by the extension.
The fields configured Always Hidden, with a default value, are processed, but are invisible in the browser window.
Validation
The extension only supports the None and Must Not Be Blank options for field validation. There is inbuilt validation logic for the UserProfileEmailAddress and UserProfilePassword fields.
Default Values
Only the None and Same For All Users settings are supported.
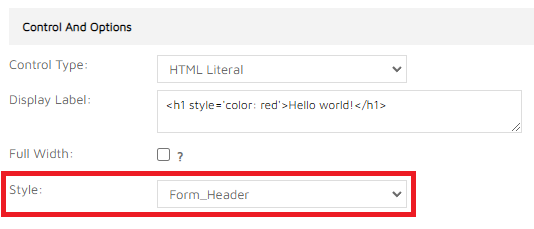
Style
Style option is only supported for the HTML Literal control type. It can be used to create section headers in the login form:
Full Width Fields
The extensions adds a new checkbox to the field definition admin page Full Width. By default, all fields are rendered on the user site in two columns. When this checkbox is checked, the field will be rendered across two columns and thus will occupy the full width of the registration modal popup on the user site.