Admin Functionality
Depending on versions, the Download and Upload functionality may not be available.
New Database
Clicking this button will open up a window to create a new database.

Database Name – the unique name for the new database.
Creation Mode – a choice one of two options to create a schema:
- Column Names – a comma-separated list of column headings for the database (e.g., Firstname, Lastname, Email). In order to match field names, column names must not contain spaces.
- CSV File – as above, a comma-separated list of column headings for the database, which cannot contain spaces. In addition, it is possible to include data on separate rows as well. When creating a database via the New Database UI, do not add a Section column, the system will add the section column automatically to the new database. Column headings are treated as literal field names used for mapping; when uploading CSVs, leading and trailing spaces are removed from headings at upload time.
Sort By – which field(s) will appear in the dropdown list for users to choose from, and the order the records will appear. See Sorting for details.
Filter By – an optional filter, to restrict which records the user sees. See Sections and Filtering for details.
After creating the database you will be able to add records and configure it in the table.
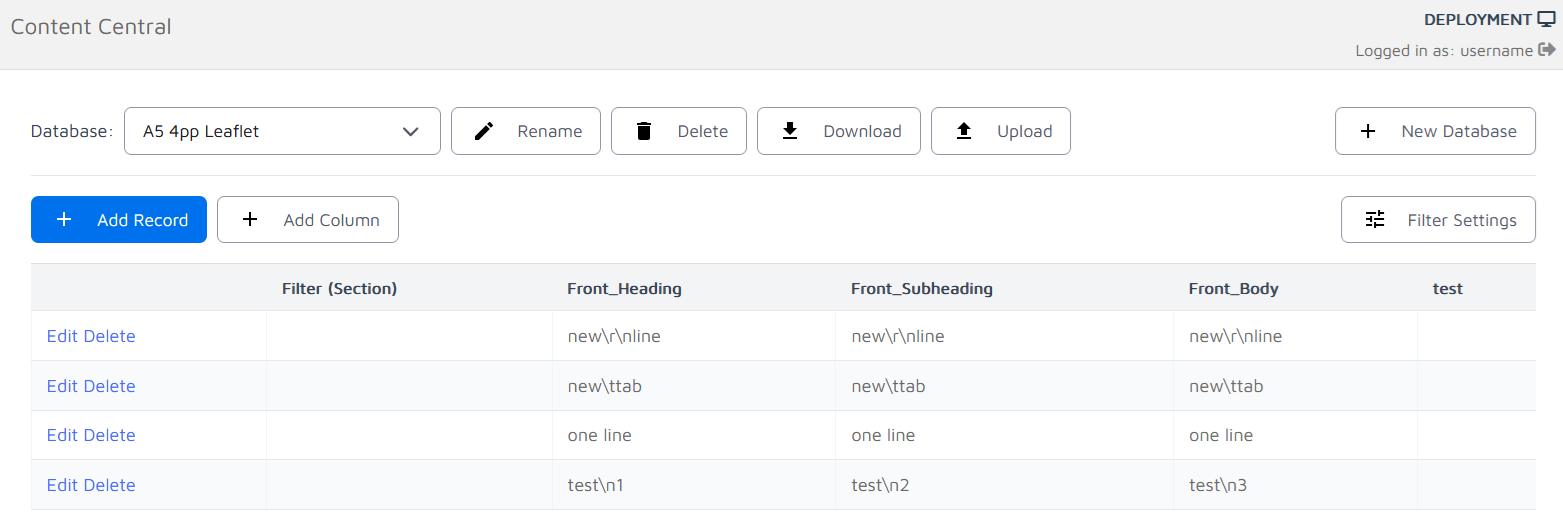
Edit Database
Selecting a database from the database dropdown will show records for that database, as well as giving you options rename, delete, upload, download and update filter settings.
Database-level actions:
- Rename – choose a new name for the database; edit and click Save to apply.
- Delete – the system checks whether the database is in use before deleting. Confirm deletion to permanently remove the database (delete is irreversible).
- Download – download a copy of this database as a CSV file. Not available in some configurations.
- Upload – replace/update the contents of an existing database from a CSV file. It is always recommended to download a backup of the current database before uploading. Not available in some configurations.
- Filter Settings – change the Sort by and Filter by settings. See Sorting, and Sections and Filtering for details.
Record-level actions:
- Add Record – click to append a new, editable row to the database table and save.
- Add Column – Click Add Column to open a modal that prompts for a column name. Columns contain only letters (A–Z, a–z), numbers (0–9) and underscores (_) and must not already exist in the database. When confirmed, a new column will be added to every record in the selected database with empty values. The new column becomes available for mapping to form-filling fields.
- Edit – click Edit on a row to make the fields editable, then click Update to save the change.
- Delete – confirm deletion to permanently remove row from the database (delete is irreversible).
Sorting
The Sort by setting controls how each records in the dropdown list is shown to the user. Use the pattern #ColumnName# to reference column values. The text between the # characters must match a column header exactly. You may combine multiple columns and spacing, for example:
- #Firstname# #Lastname# – might appear as “Jane Smith”
- #Branch# – #Department# – might appear as “Cambridgeshire – Marketing”
Remember, when building the Sort by label, include only column names wrapped in # symbols; any other text will be displayed as-is.
Sections and Filtering (How visibility is determined)
Content Central supports sectioned databases so that users see only the records that match a value stored in their user profile.
- Each database has a section (filter) column. The Filter Settings → Filter by option determines which user profile field is used to match against the section column.
- Example: If Filter by is set to Office and a user’s Office profile field value is “Watford”, the user will see only database rows whose section column value matches “Watford”.
- If the user’s profile field is blank or you set Filter By to No Filter, the user will see all records.
- Default field names:
- Systems upgraded from the older Form Filling Database extension may use the profile field FormFillingDatabaseSection as the default.
- Newer systems use Content Central Section as the default profile field name.
- You may choose any user profile field as the Filter By value, provided it is included in the Filter By dropdown.